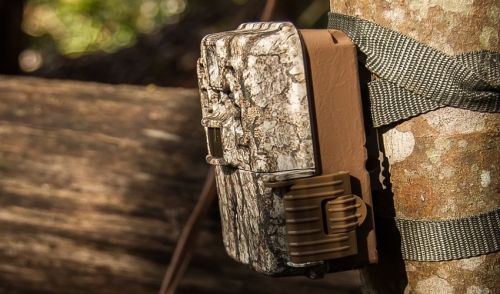
How to Pick the Best Spots for Your Trail Cams
Trail cams are ideal for monitoring trails and feeding areas, capturing videos or photos of visiting wildlife and planning hunts or wildlife watching, but if your cameras are in the wrong spot, you will get inadequate views with poor quality or even no views at all. Fortunately, there are easy ways to get the best views by putting your trail cams in the very best spots.
7 Steps for the Best Trail Cam Views
No matter what type of camera you use – an old favorite or the newest high tech setup – these steps can help you position the cameras for the best results.
- Follow Directions
Before setting up your trail cams, read all manufacturer instructions and follow them closely to make the most of the camera's features for optimum performance. Note battery lifespans, recommended security precautions and other best practices when mounting and programming your cameras.
- Study the Animals
Whether you use trail cams to track deer, wild turkeys, cougars or other animals, you will get the best views if you study the animals first. Learn their preferred routes and their habits for where and when they feed, favorite watering places and resting shelters. If you know where the animals prefer to be, you can position your cameras in just the right spot for exceptional views.
- Choose the Proper Height
The best height to mount your cameras will vary depending on what animals you hope to see. Ideally, mount the camera at an average chest height for the animal, which will give you the best chance for clear views that fill the camera's frame.
- Choose Direction Carefully
Where your camera faces can make a tremendous difference in photo and video quality. North-facing views are best and will not show interference or glare from the sunlight, but be sure to note adjacent shadows and the animals' typical approach directions to position the cameras for the best overall views.
- Keep Out of Sight
The best trail cams should be somewhat concealed from wildlife, and it can be useful to put several branches or leaf sprigs around the camera to break up its outline and provide good camouflage so animals will not be spooked. Take great care not to interfere with the camera's line of sight, however, or with any sensors or other features. Concealing the camera can also help keep it secure from vandals or thieves, but it may take some trial and error to have the camera positioned well without being blatantly visible.
- Funnel the Wildlife Traffic
You can get better photos with your trail cams if you position the equipment in a funnel area where wildlife naturally comes together in a narrow space. A fence or thicket can constrict the path of different animals, and a narrow trail or popular water crossing area can be equally useful for constricting wildlife and ensuring they pass through the same small area.
- Remove Obstructions
Once you have your camera mounted in the best possible spot, check for any obstructions that affect the field of view, such as a drooping branch or broken limb. Trim those obstructions away, but in a controlled, careful way that will not make the camera more noticeable. Be sure to recheck the camera's view periodically to be sure new obstructions have not interfered with the view.
Trail cams can be useful tools, but only if you position the camera appropriately for great views and take good steps to use the camera to its best ability. Properly used, however, trail cams can offer amazing views for hunters and wildlife watchers of all abilities and interests.
